
Hey everyone, Rohit here! Today, we’re going to learn how to free up reserved bandwidth in Windows.
Did you know that Windows automatically reserves a portion of your internet bandwidth for system tasks like updates and error reporting? While this helps keep your system running smoothly, it can also slow down your browsing speed. In this guide, I’ll show you how to disable or reduce the reserved bandwidth percentage so you can enjoy a faster internet experience. Let’s dive in!
Steps –
- Open the Start menu and click on Run. Alternatively, press Windows + R (press both the Windows key and R key simultaneously).
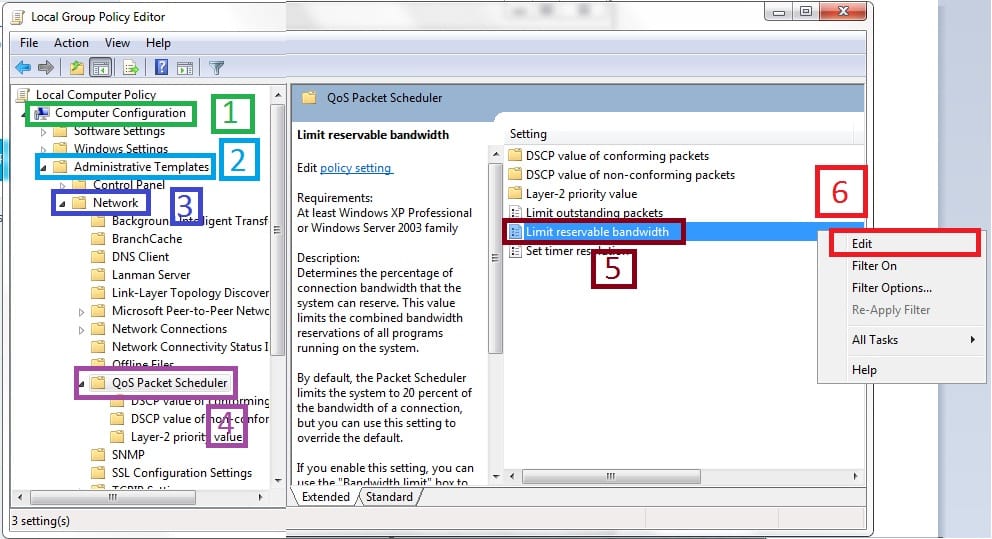
- In the Run box, type gpedit.msc and press Enter to open the Group Policy Editor. In the left pane, navigate to:
- Computer Configuration → Administrative Templates → Network → QoS Packet Scheduler.
- In the right pane, find Limit reservable bandwidth, right-click on it, and select Edit from the dropdown menu.
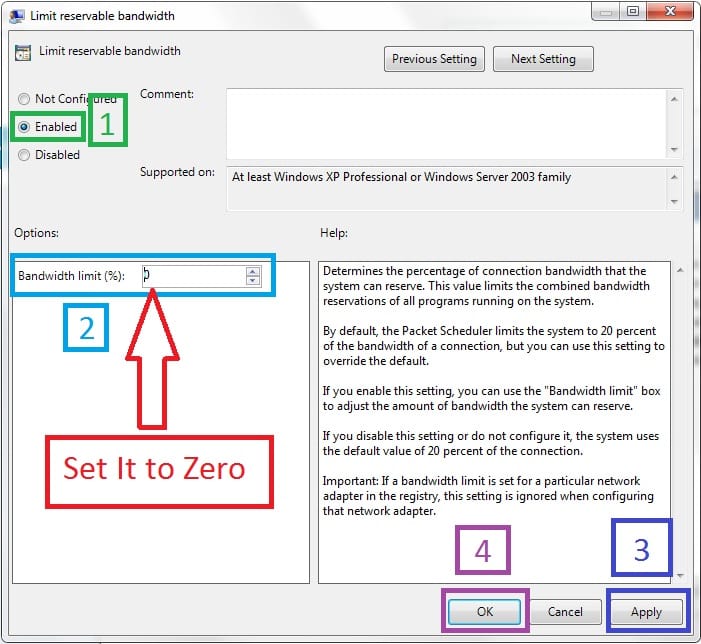
- By default, the state will show as “Not Configured,” but Windows still reserves 20% of your bandwidth. The trick is to set it to 0%. To do this, select Enabled, then change the Bandwidth Limit (%) from 20 to 0.
- Click Apply, then hit OK to save the changes. That’s it!
Wasn’t that easy? Yep, it sure was! Now it’s time for me to sign off.
That’s all for this guide! I hope this helped you to Free Reserved Bandwidth In Windows 7. If you found this useful, be sure to check out my other blogs for more tips and tricks on optimizing your Windows experience.
🔍 Explore more here: https://rohitlal.in/blogs
Leave a Reply