
Hey everyone, Rohit here! Today, I’m going to show you how to enable the Hibernate option in Windows 7. So, without wasting any time, let’s dive right in!
What Does Hibernate Mode Do?
The Hibernate feature saves all your open documents and running applications to your hard disk and then shuts down the computer. When you power it back on, everything resumes exactly where you left off—just like pausing time on your PC!
Why Do You Need Hibernate Mode?
The best way to understand Hibernate mode is by looking at real-world situations where it comes in handy.
Imagine you’re in the middle of an intense gaming session, and suddenly, the power goes out. If your UPS or inverter battery is low, you risk losing all your progress. This is where Hibernate mode becomes a lifesaver—it allows you to save the current state of your computer so you can continue exactly from where you left off later.
Hibernate vs. Sleep: What’s the Difference?
While both Sleep and Hibernate are power-saving features, they work differently:
- Sleep Mode: Pauses your computer by storing active applications in memory (RAM) while using minimal power. It’s ideal for short breaks.
- Hibernate Mode: Saves everything to your hard drive and completely powers off the system, using zero power. It’s perfect when you won’t be using your PC for an extended period.
How to Enable Hibernate in Windows 7
- Click on the Start button and open Control Panel.
- In the View by dropdown, select Large icons instead of Category view to see detailed options. (Skip this step if you’re already using Large icons view.)
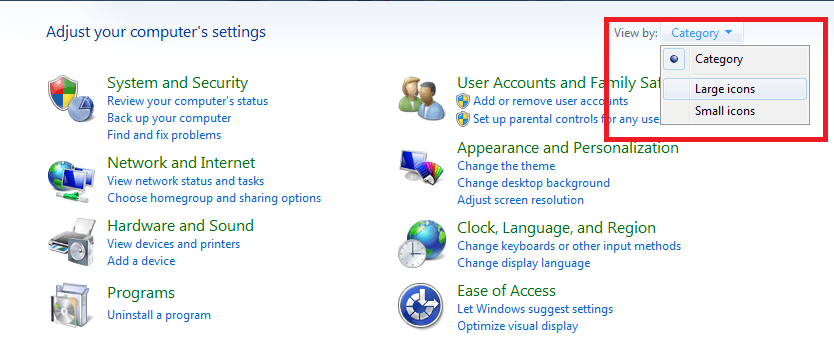
- Click on Power Options.
- Under your preferred power plan, click on Change plan settings. (By default, “Balanced” is selected, but if you’re using a different plan, click on its respective “Change plan settings” option.)

- In the new window, click on Change advanced power settings.
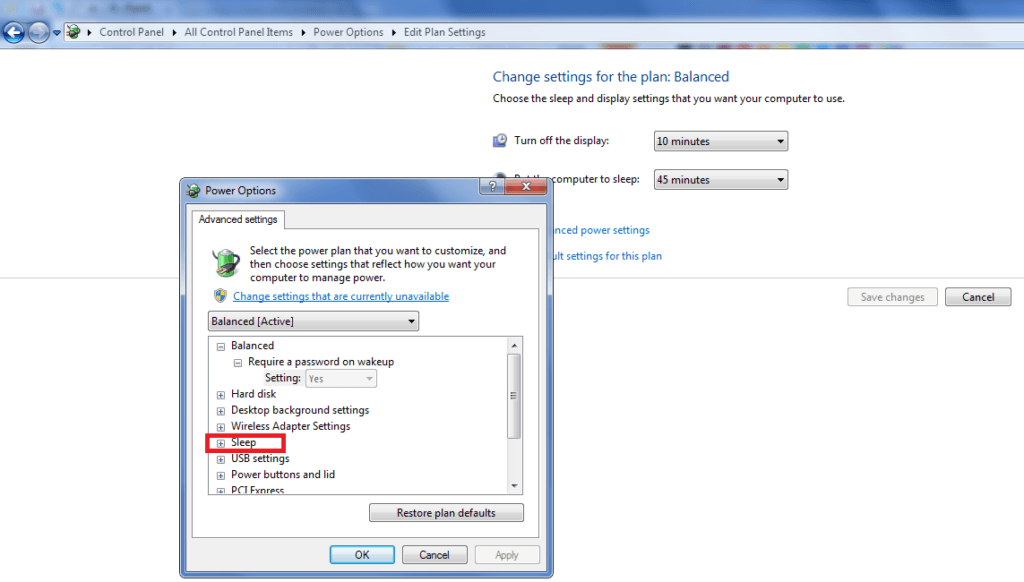
- A Power Options dialog box will open. Expand the Sleep section by clicking the ‘+’ icon.
- Expand Allow hybrid sleep, then change the setting to Off.
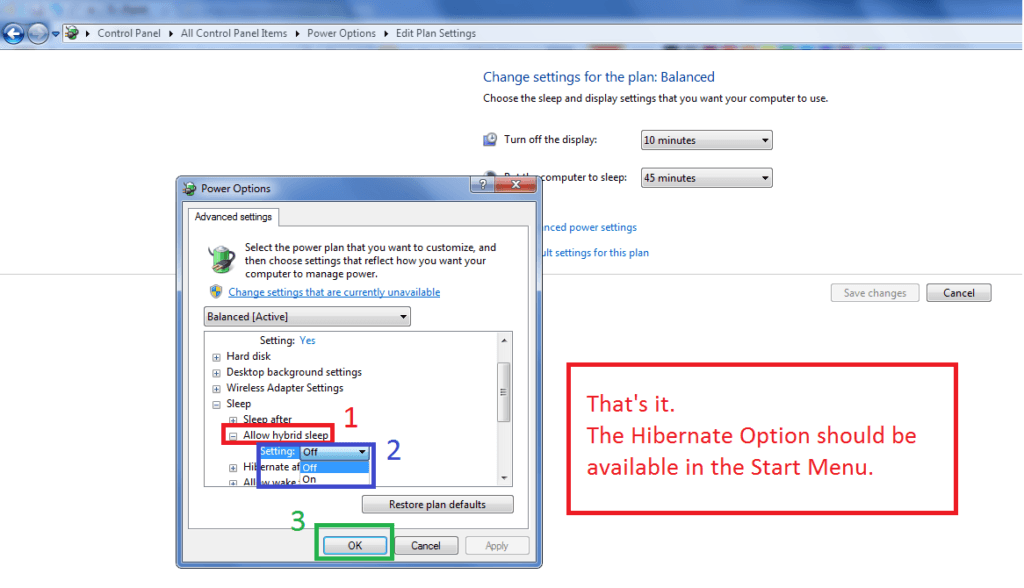
- Click Apply, then OK to save the changes.
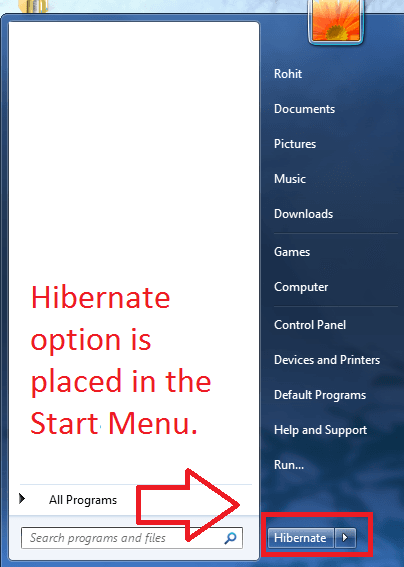
- That’s it! The Hibernate option is enabled and will now be available in the Start menu under the Shutdown options.
How to Replace the “Shutdown” Button with “Hibernate” in the Start Menu
- Right-click on the Start menu and select Properties.
- In the Start Menu tab, locate the Power button action dropdown menu.

- Select Hibernate from the dropdown list.
- Click Apply, then OK to save the changes.
That’s it! The Hibernate option will now replace the Shutdown button in the Start menu. 🚀
That’s all for this guide! I hope this helped you enable the Hibernate option in Windows 7. If you found this useful, be sure to check out my other blogs for more tips and tricks on optimizing your Windows experience.
🔍 Explore more here: https://rohitlal.in/blogs
See you in the next one! 🚀
Leave a Reply