Hello everyone! It’s me, Rohit, and today, I’m excited to share one of my projects with you—the Blind Helper Stick.
This project is essentially a smart obstacle detection system built using Arduino that detects obstacles ahead and alerts the user, helping visually impaired individuals navigate safely.
So, without further delay, let’s dive into the key aspects of this project! 🚀
Problem Statement – Why Do We Need A Smart Obstacle Detector?
Blindness is a major challenge that limits mobility. A visually impaired person cannot walk freely without assistance and often requires a companion to guide them.
Our Solution
Our Blind Helper Stick addresses this issue by detecting obstacles in the user’s path and providing real-time alerts to prevent collisions. While it may not completely replace human assistance, it enhances independence and safety to a great extent.
Now, let’s get into the technical details!
Components Required
To build this project, you’ll need the following components:
- Arduino Uno (or any similar microcontroller)
- Ultrasonic Sensor SR-04
- Infrared Sensor (Optional – see the last section for details)
- Connecting Wires
- Arduino IDE (for coding and uploading the program to the Arduino board)
Understanding the Basics
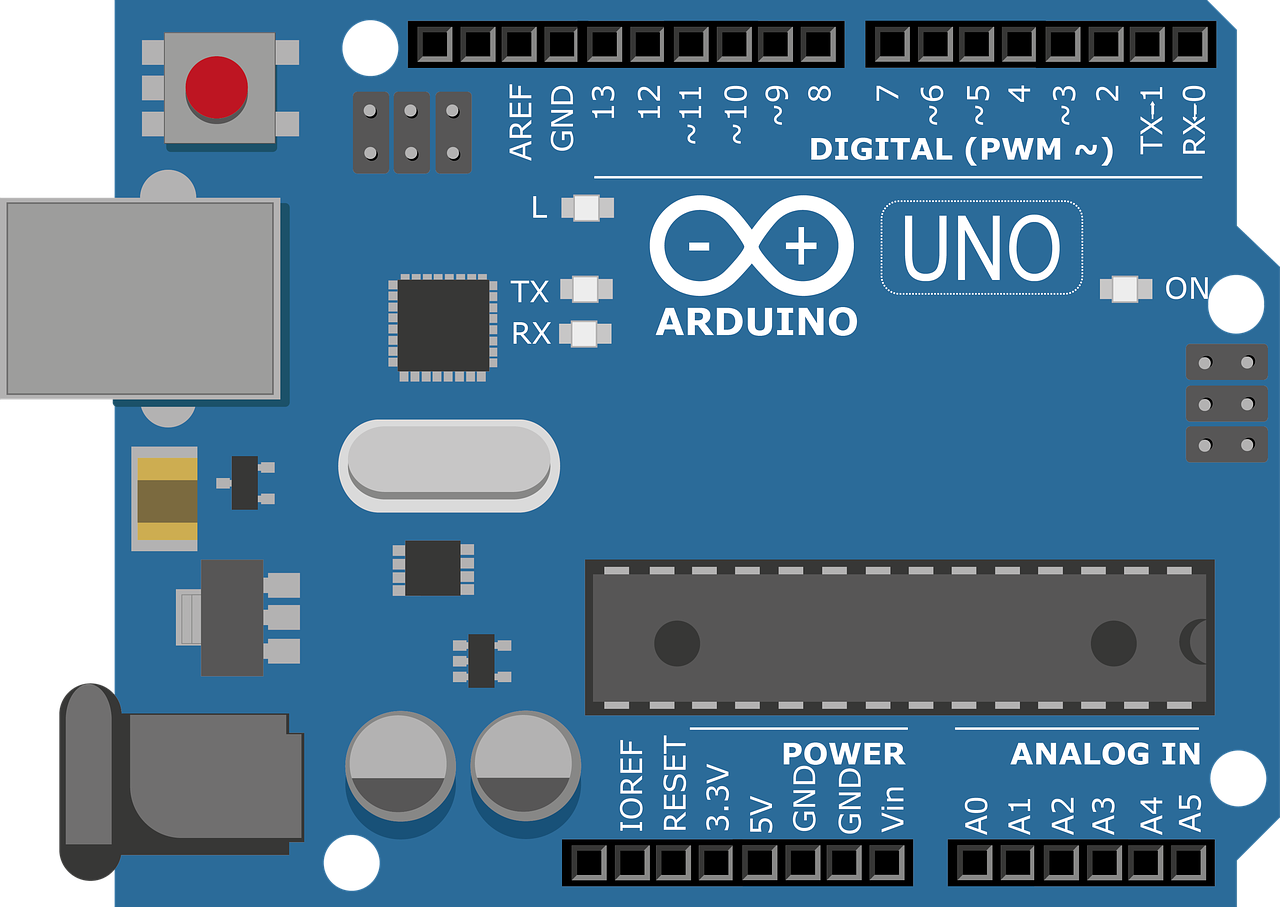
Arduino
Arduino is an open-source electronics platform based on easy-to-use hardware and software. It can be programmed to perform various tasks, such as lighting an LED or transmitting data to a web server. Programming is done in the Arduino Programming Language.
Ultrasonic Sensor SR-04
This sensor measures distance using the strike-and-reflect principle. It sends out ultrasonic waves, which reflect off an obstacle (if present) and return to the receiver. The time taken for the waves to return helps calculate the distance of the object.
Infrared Sensor
Similar to the ultrasonic sensor, the IR sensor also works on the strike-and-reflect principle, but it uses infrared waves instead.
Steps to Build the Blind Helper Stick
- Download and install the Arduino IDE from the official website.
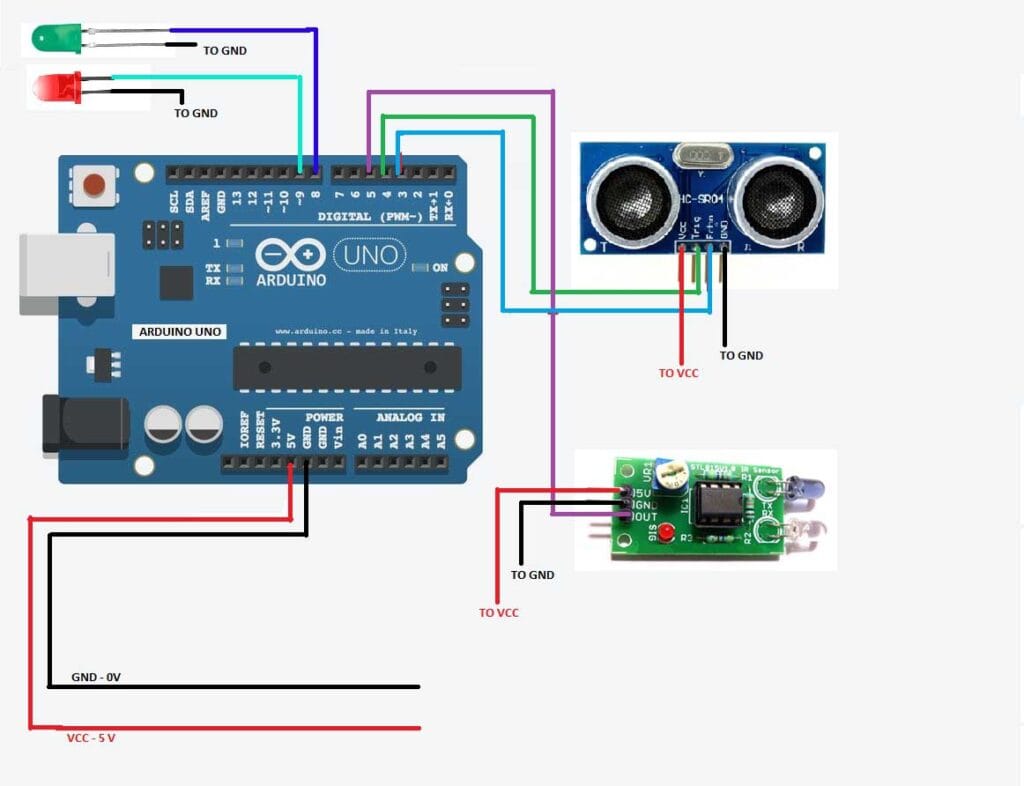
- Assemble the circuit as per the provided circuit diagram.
- Download the Arduino code.
- Upload the code to the Arduino board.
- Test the hardware to ensure it’s working correctly.
Final Touch – Handling IR Sensor Limitations
You might notice that the IR sensor doesn’t work properly in broad daylight. This is because sunlight contains infrared radiation, which interferes with the sensor and causes false readings.
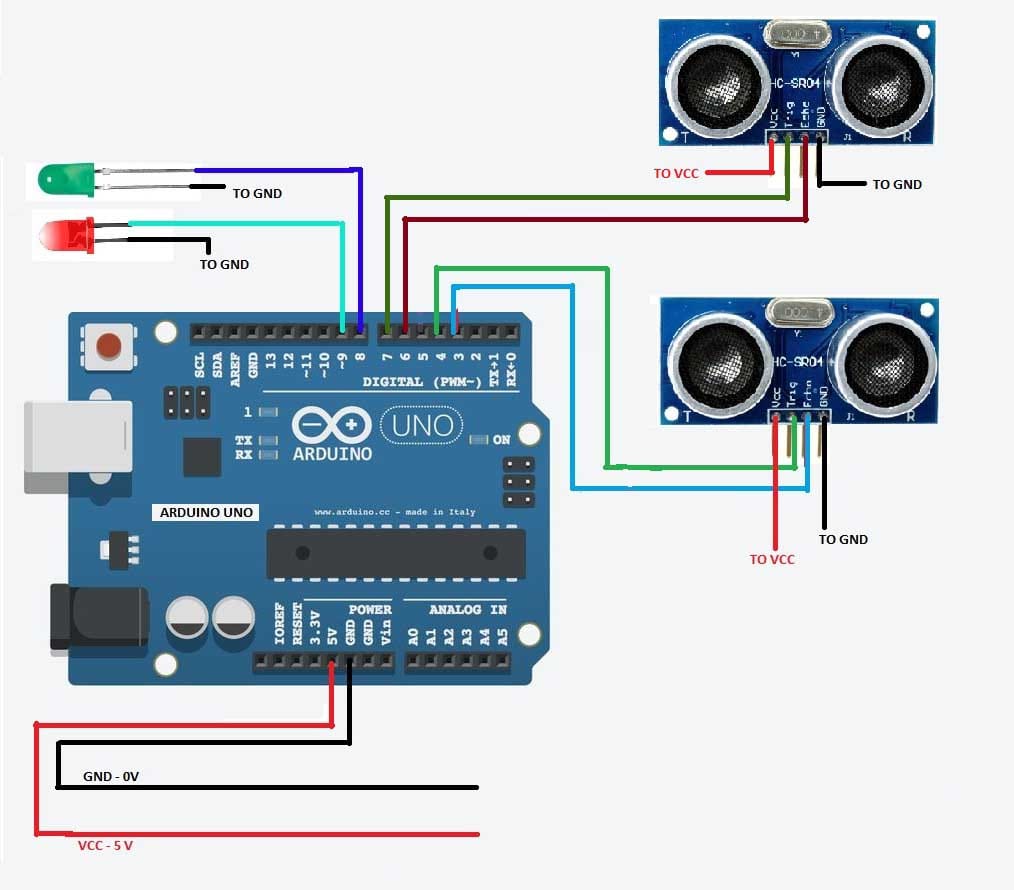
Improved Version: Using Two Ultrasonic Sensors Instead
To fix this issue, I modified the design to use two ultrasonic sensors instead of an IR sensor. This ensures better accuracy and reliability in all lighting conditions. (Check out the updated circuit diagram and code!)
I hope this guide helps you in building your own Blind Helper Stick. If you have any questions or need assistance, feel free to leave a comment below.
Thank you for reading! Don’t forget to check out my other blogs for more exciting projects. 🚀
Note: This is a migration of my older post originally written in January 2017.
Leave a Reply